Mastering AR and CG Graphics in Virtual Sets
Mastering AR and CG Graphics in Virtual Sets
Learn to build visually dynamic virtual productions with AR (Augmented Reality) and CG (Character-Generated) graphics using WASP3D. This step-by-step tutorial walks you through how to create, manage, and deliver professional broadcast graphics for virtual sets.
Getting Started with AR and CG Graphics
Before jumping into production, it’s important to understand the tools. With WASP3D, you gain access to real-time templates, animations, and dynamic overlay control that brings your virtual content to life.
In this video, you’ll learn how to:
-
Build and customize playlists
-
Use Preview and Program windows effectively
-
Apply seamless transitions
-
Modify and animate graphics in real time
Let’s dive into each of these key areas below.
Creating and Managing CG Playlists
Creating a playlist is the foundation of your virtual graphic workflow.
Build and Organize Graphics
-
Create a new CG playlist and name it for clarity.
-
Drag and drop templates from the pool into your rundown.
-
Structure your playlist for quick switching and organization.
Use Rows and Shortcuts Efficiently
-
Assign row numbers to select specific templates quickly.
-
Double-click an item to load it into the Preview or Program window.
These features help save time during live production.
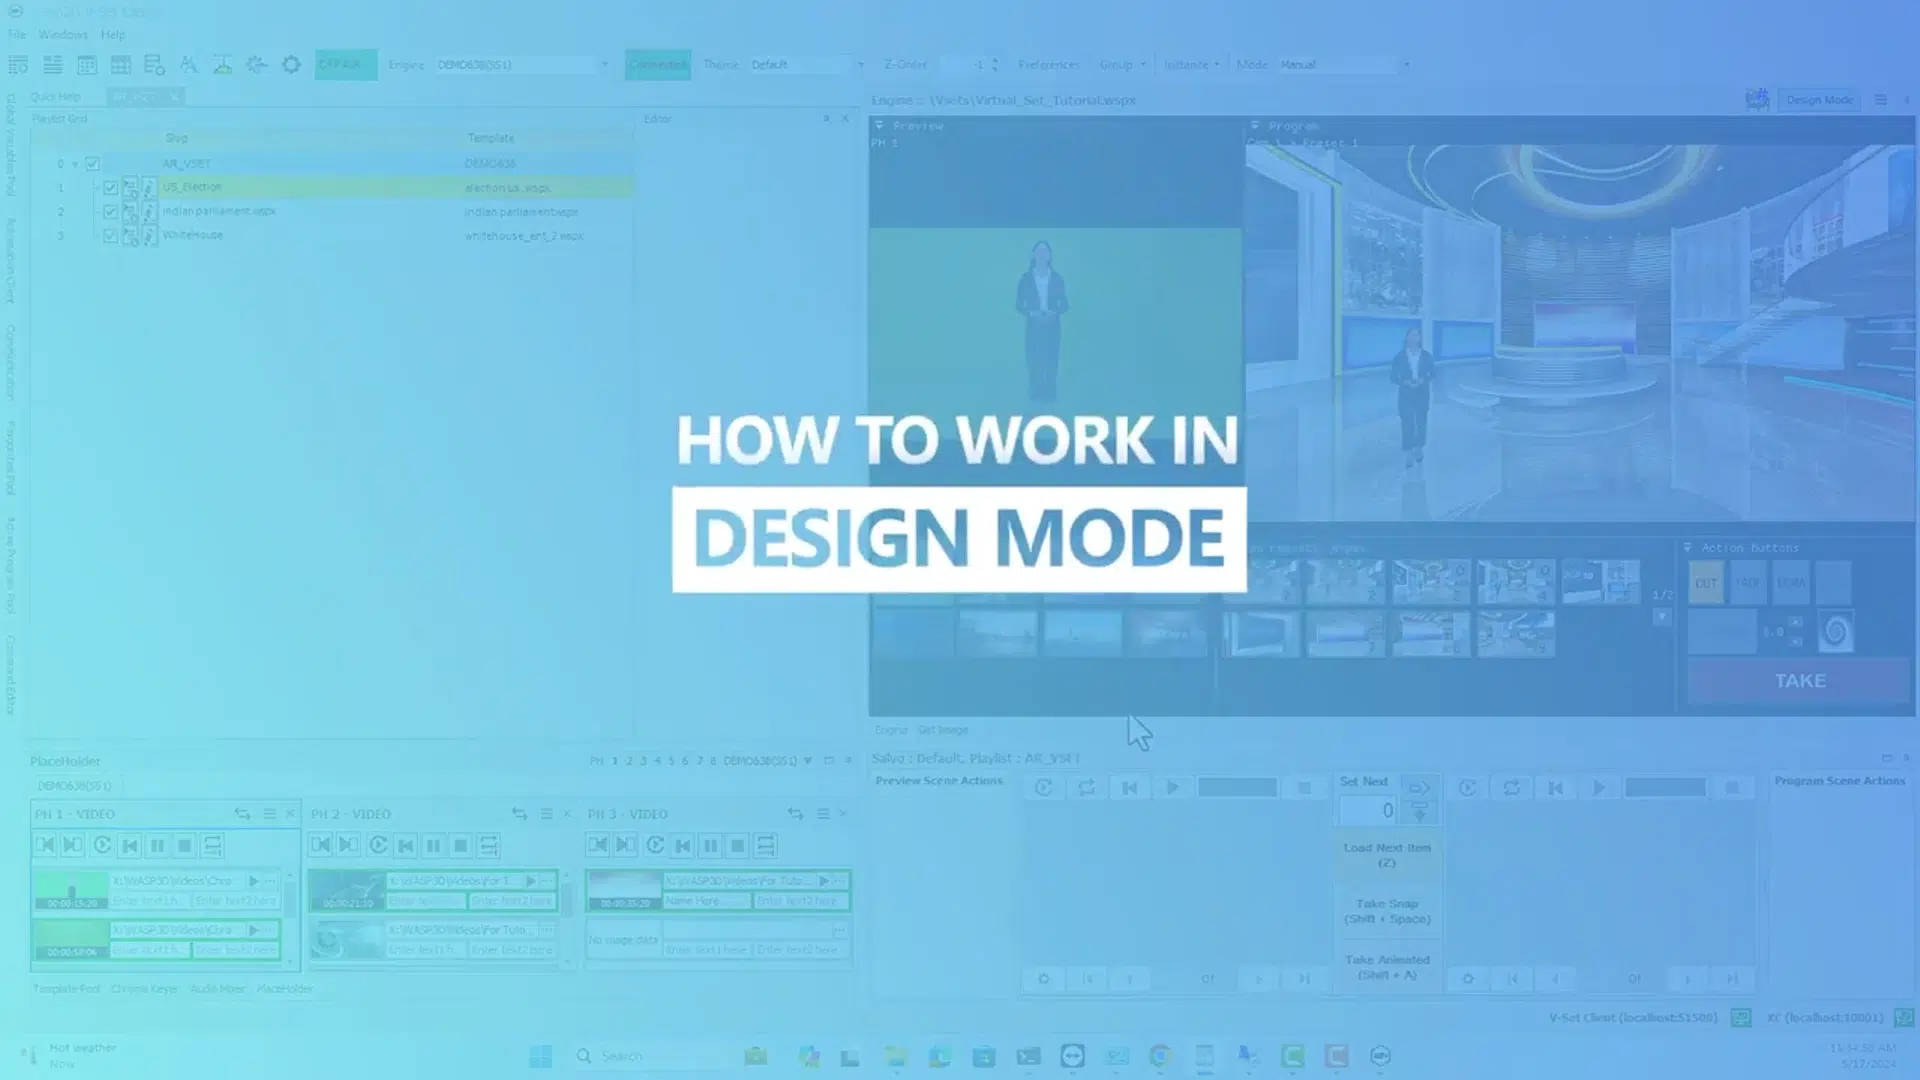
Preview and Program Modes Explained
Understanding how to toggle between Preview and Program views is essential.
Confirm Graphics Off-Air First
-
Use the Preview window to test animations and check data.
-
Once approved, move it to Program using Take Snap or Take Animate.
Switch with Ease
-
Take Snap: for instant cut transitions
-
Take Animate: for animated, professional flow
In addition, these tools ensure accuracy before your graphics hit the screen.
Transitioning Graphics Seamlessly
Transitions are crucial in keeping broadcasts smooth and engaging.
-
Swap between graphics instantly using Snap or Animate.
-
Transitions allow for a polished look without disrupting the scene.
-
Moreover, this process maintains professional production standards.
Real-Time Data Editing and Customization
Not all graphics are static. Often, live broadcasts require updates on the fly.
Modify Content in Real Time
-
Update text and data fields directly in the interface.
-
Reflect live events or numbers (like vote counts or stock prices).
-
As a result, your graphics stay timely and relevant.
Scale and Position Graphics
-
Use the Edit Instance feature to scale in X, Y, or Z dimensions.
-
Maintain clean proportions and match the scene composition.
This flexibility makes it easy to adapt graphics mid-broadcast.
Enhancing with the Engine Tab and Playlist Features
WASP3D’s Engine tab gives you advanced control over graphic playback and animation.
Use Presets and Animate Smoothly
-
Apply presets for specific styles or animation behaviors.
-
Control multiple elements across scenes.
In addition, you can load and play various templates from the Standard Playlist.
Overlaying Lower Thirds and Fullframes
Overlay graphics are perfect for storytelling, branding, or delivering additional information.
-
Add CG overlays like lower thirds, tickers, and fullframes.
-
Modify the data and appearance to suit your layout.
Furthermore, these overlays are highly customizable and support live updates.
Conclusion – Build Broadcast-Ready Virtual Graphics
By following this tutorial, you’ll be fully equipped to create engaging, broadcast-quality AR and CG graphics for virtual sets.
WASP3D makes it easy to:
-
Produce dynamic visuals
-
Update data live
-
Enhance broadcast storytelling
In conclusion, this toolset is ideal for news, sports, finance, or elections—where speed, accuracy, and visual quality matter most.